|
02/01/2022 |
|||||||||||||||||||||
|
|
|||||||||||||||||||||
|
Quick Links |
|||||||||||||||||||||
|
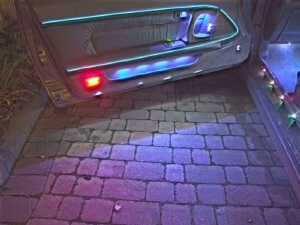
EL wire is a lighting product which is basically a plastic tube that lights up along it’s whole length when a voltage is applied. The same technology is available as a plastic flexible EL sheet, handy for back lighting scales and screens. The product comes in various sizes, colours & shapes such as “tail wire” which has the added mounting benefit of a 1cm flat tab running along one side to allow stapling/sowing. EL can work in very long continuous lengths. It’s water proof, can bend, is shock proof, can be cut to any length desired and gives off virtually no heat. IThe EL wire requires a driver which produces a high voltage, high frequency current, these tend to come in different sizes to power various lengths of wire. This can be run through standard cable such as speaker cable. Individual lengths of wire can be run in series or parallel from each driver. The wire can be dimmed, flashed and chased. |
|
|
||||||||||||||||||||

|
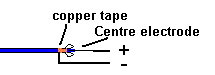
When using EL wire you need to remember to allow a length for electrical connection. The best way to do this is as follows: You will need: Speaker cable, Thin glue lined heat shrink tube, copper tape & a soldering iron. Strip the OUTER plastic sleeve off the centre wire, inside you will find a smaller plastic wire - this is the actual business part of the package! Carefully strip the second layer of plastic insulation off this centre part, inside you should have 2 tiny exciter wires - these are extremely thin and easily broken if you’re not careful stripping off the inner plastic coating. Down the very centre of the wire is the EL part it’s self, this is basically a solid wire with an electroluminescent coating. Now you have stripped you cable you need to join it to your supply cable, I would recommend you use a thin speaker cable for this purpose. Wrap a bit of copper tape around the last bit of outer sleeve (coloured part) then solder your 2 exciter wires to this tape along with the neutral of your EL supply cable. Next you scrape clean the centre conductor, this can be soldered directly onto the positive EL supply wire. |
|
|
||||||||||||||||||||

|
If you found this guide helpful or have a comment, please sign my Guest Book or use the Message Board. |