|
02/01/2022 |
|||||||||||||||||||||
|
|
|||||||||||||||||||||
|
Quick Links |
|||||||||||||||||||||
|
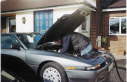
I hate taking my car into a garage, I trust no one with my car! The only time I ever took my car to the garage was when the head gasket went the first time, I had to get it done by a garage to keep the warranty guys happy, even then the only mechanics that did not run away screaming like girls were the guys at my Toyota dealership! Nobody wants to work on these things! So, when the gasket went again a couple of years later and with no warranty, I decided to tackle this beast of a power plant myself! Yes, it all looks very scary and complicated at first but, trust me, most of it’s a bunch of bolt on junk that, once removed, reveals a very simple engine, just the same as any other! The hard part is getting it all off and remembering where it all goes when you put it back again! It is not a cheap job by any means, the metal head gasket alone costs £275, the gaskets and various parts you require from Toyota, will then set you back another £250, it is also worth renewing the valve steam oil seals and cam seals also while the head is off, this is another £130! Add to that head skimming and preparation £130. You get the idea, the job costs quite a bit of cash, so to do it yourself and save the labour charge is a good idea! I found the two best sites for information on head work are the SONIC tech pages and the SOGI TSRM These sites are extremely helpful and the TSRM is the most helpful resource for the Supra there is, it’s the definitive guide on how to pull stuff apart and put it back together again. I have found it helpful to print off large sections of this and put a manual together for the Supra, particularly in my case the electrical diagrams! When it comes to identifying parts for the Supra, again go to the SOGI EPC Here you will find the same exploded diagrams the parts people look at down your local Toyota dealership, complete with part numbers and a price guide. |
|
HEAD GASKET CHANGE INFORMATION |
|
|
||||||||||||||||||||||||||||||||||||

|
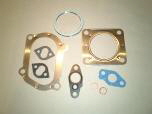
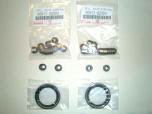
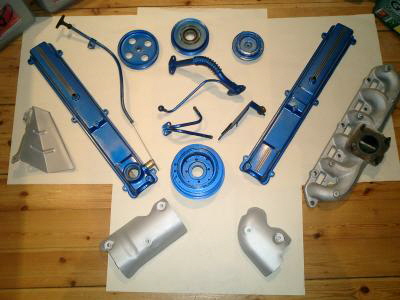
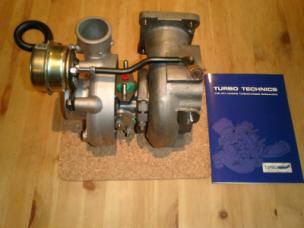
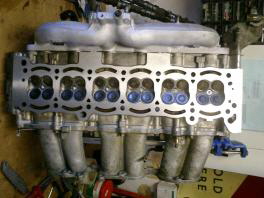
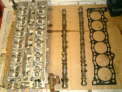
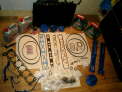
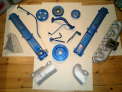
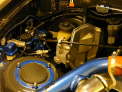
The main list of parts changed went as follows: * HKS Stopper type head gasket * Set of head bolts * Inlet gaskets x 2 and exhaust gasket * Hybrid Turbo, new fixing nuts and seal kit (may not need all seals with new turbo) * Valve steam oil seals x 24! and cam oil seals * New drive belts - 1 set A/c, Alternator, P/S and Cam * The O-ring for the cam position sensor, remember this one! * Oil feed and fuel line copper gaskets - as many as you disturb * Dip stick O-ring, oil and filter * Rocker cover gaskets and centre gasket (upgrade for this middle gasket is available) * Coolant, thermostat and rad cap, also I replaced the top hose * Fuel injector O-rings x 12 * PCV hoses - all, these turn brittle from oil mist * Spark plugs, the only type to fit are IRIDIUM Grade 7 T734OB-7, these wont melt! * EGR gaskets (you can remove this lot and blank off if you wish) That just about covers it!, while the head was in pieces it seemed a good idea to tidy the engine bay up, a fresh coat of paint on parts helps a load! just make sure its all clean and you strip old paint off, use only high temp paint. |
|
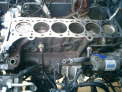
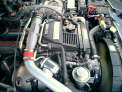
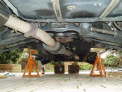
Stripping the engine down is fairly self explanatory, start by removing all the ancillary pipe work. You will find it all explained here in detail. One tip I will give before you remove the engine wire is, put a big wrench on the main pulley bolt and wedge it up against the engine bay wall, now turn the engine over, this will crack the nut on the pulley, and save you a huge amount of stress, that thing is tight! A couple of days before you strip the engine I would spray all the exhaust and turbo bolts with WD40, this will soak in and make them all come out a dream, I did this and had not one nut or bolt mess me about. Some parts are a bit of a struggle to reach, stuff like the turbo oil feed and drain, also the coolant pipes on the engine have to be released as you remove the head. |
|
|
|
|
||||||||||||||||||||
|
|
|
||||||||||||||||||||||||

|
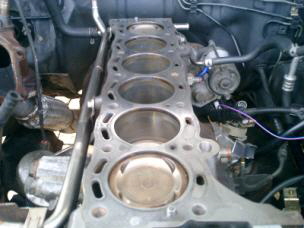
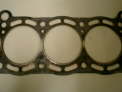
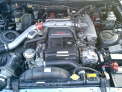
The main sings I found that my head gasket had gone were: * Bubbles in the water expansion tank. * Water hoses becoming hard as soon as engine started. * Poor starting due to water in pots, this is because water is harder to compress than petrol. * Water loss with no external leaks. It is worth noting that a block test will not always confirm a BHG, this is because the breaks can seal up when the engine is cold, this type of blow is the one that goes undetected and can lead to greater engine damage. |
|
|
|
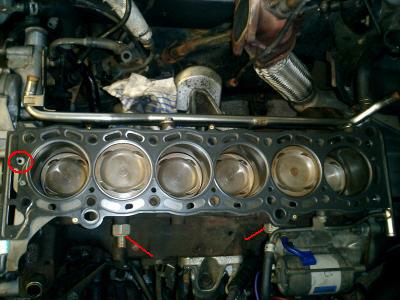
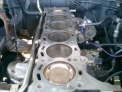
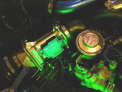
One thing to be care full of when de-coking the pistons is not to clean off the deposit left right at the top of the pots, this has built up over time and can help the piston seal properly, this is particularly so on an older unit, if you do take this carbon deposit off you may find you burn a bit of oil for a few thousand miles. |
|
|
|
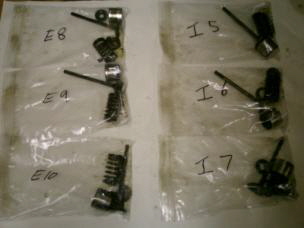
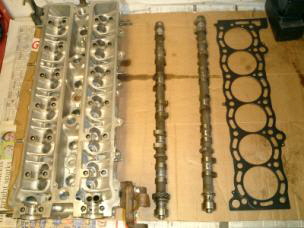
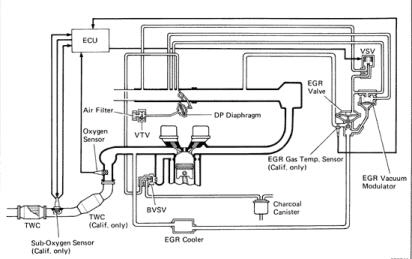
Decoke all your valves before you get the head skimmed, leave the old spark plugs in there and use a drill type wire brush tool. When finished clean the debris off and lay the head flat and upside down, now fill the valve recess with white spirit and check the valves do not leak, if they do your workshop will be able to re-seat these for you, I am glad to say these were all OK. While removing the exhaust manifold I found a couple of the bolt holes had been hellicoiled from Toyota’s previous work, I also found they had fitted two exhaust gaskets!?, I could find no reason for the second gasket, however, I did take the time to hellicoil the remainder of the threads and use new bolts, I also painted the manifold and heat shields with hi temp paint. It is up to you at this point if you keep the EGR system or not. A blanking plate is available or easily made up. I kept my system going as all the parts functioned properly however, if you find a problem with yours, you can simply remove this added complication and blank off the holes. You must leave the O2 sensor in though for the ECU. This systems only propose is to slightly reduce NOX emissions by recirculating some of the exhaust gas and lowering the maximum combustion temperature. |
|
|
||||||||||||||||||||||||||||
|
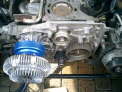
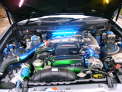
Once the head is back on you can refit the cams, remembering to lubricate them and fit new seals. Once the cams are fitted you can refit the Turbo and its oil feeds, I also found it better to renew all the Turbo mounting nuts and bolts, this make life easier should it all need to come off again in future projects and minimises the risk of slipping spanners etc.! Once the Turbo had been fitted I refilled the engine with fresh oil, this can be poured in the top of the cylinder head. Once this was done I used a battery drill with a socket attachment to run the oil pump, this primed the Turbo bearing and all the cams, you should see the oil pump out of the cams where the bearings are. All the covers and inlet manifold can be fitted now, I replaced all the head cover gaskets including the one over the spark plugs. All the PCV pipes were replaced too, the oil mist in these and the heat make them go hard, they then no longer seal properly causing idle problems. The timing gear can now be fitted back into the car and the cam position sensor complete with new O-ring, there is a procedure for the refitting of all these parts is here in the TSRM. The engine wire can be fitted back in stages as you find easy, I took all the old tape and sleeving off of mine and recovered it all with new corrugated black sleeving, this is alot smarter than the burnt out old stuff! Once all the gubbins is back together, leaving the new radiator till last. Refill the cooling system with the proper Toyota Red coolant. |
|
|

|
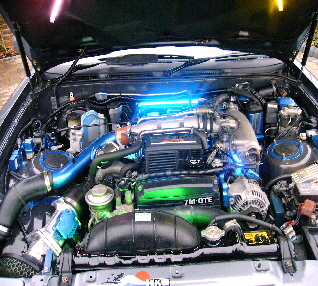
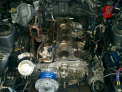
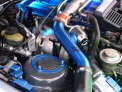
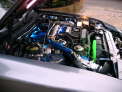
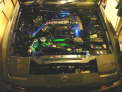
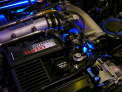
Now enjoy! Your engine should be gleaming by the time you have finished, a quick polish of the engine bay will set it off beautifully, I have spent many hours removing bits one at a time and either polishing them or painting them, the result has been pleasing, the engine always gets a crowd at the local meets, with the recent addition of some lighting it even shines at night! I hope this has been of use to you, should you have any questions, tips or corrections please E-mail me or post a message on the board. |
|


|
If you found this guide helpful or have a comment, please sign my Guest Book or use the Message Board. |
|||